Connection Setup: Pick[+] Core
This page covers the connections for Pick[+] Core, which uses a USB camera. If you are setting up the Ethernet version, see Flex. To identify which version you have, see Pick[+] components.
![Pick[+] Core connection overview: control box, robot arm and Server/Client PC](/3.x/assets/3.x/installation_assets/core_schematic.png)
Hover over the LED, USB or Ethernet connection to see how it is wired.
Camera Connection
Pick[+] Core uses a USB camera that can be mounted on an LED case.
1. Camera (USB)
- Connect the USB-C end of the cable to the camera.
- Connect the USB-A end to a USB
3.1 Gen 2or USB3.2port on the Server PC. These are the 10 Gbps ports of the PC.
WARNING
- USB 2.0 is not supported: the camera will not connect.
- USB 3.0 or USB 3.1 Gen 1 only enables the RGB sensor; depth functionality will be unavailable.
- A USB 3.1 Gen 2 or higher port (minimum
10 Gbps) is required for both the RGB and depth sensors to work.
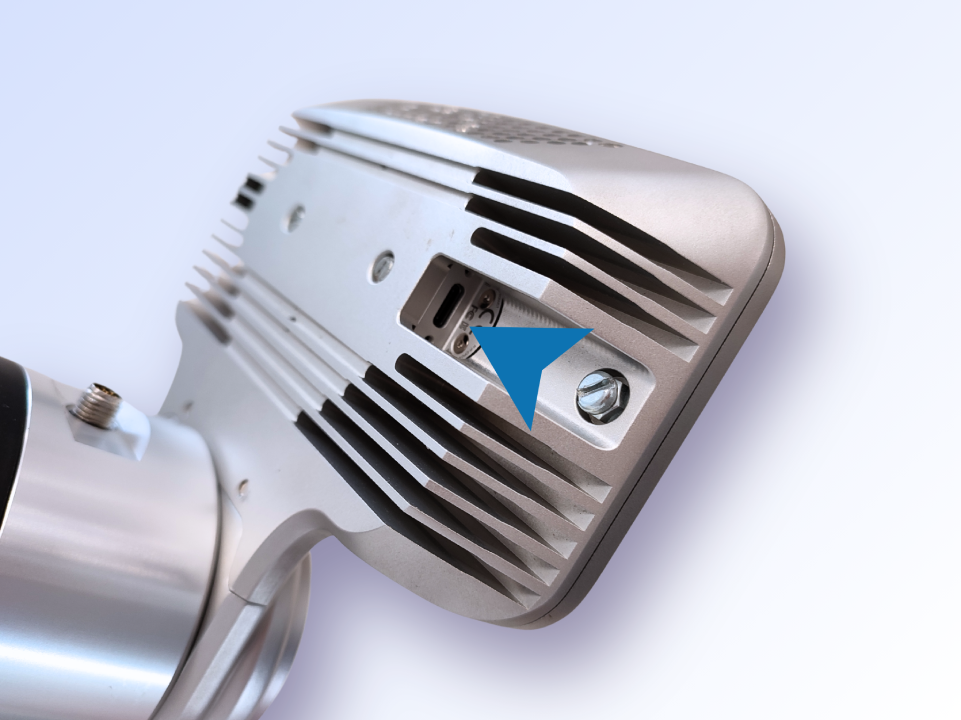
2. LED case
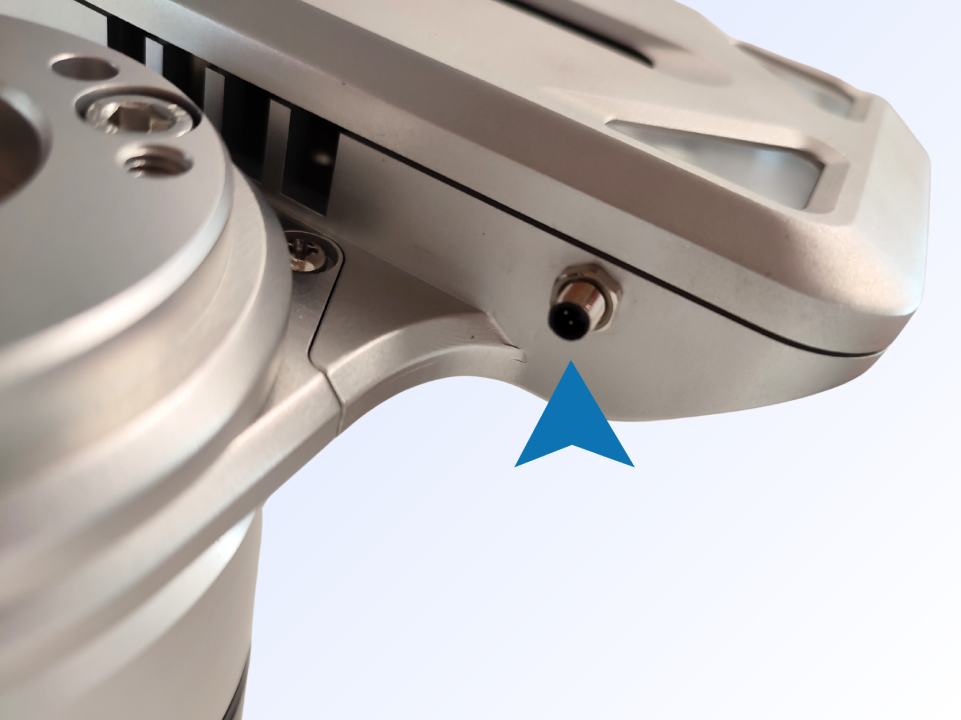
- Connect the pinned end of the LED cable to the connection slot on the camera case.
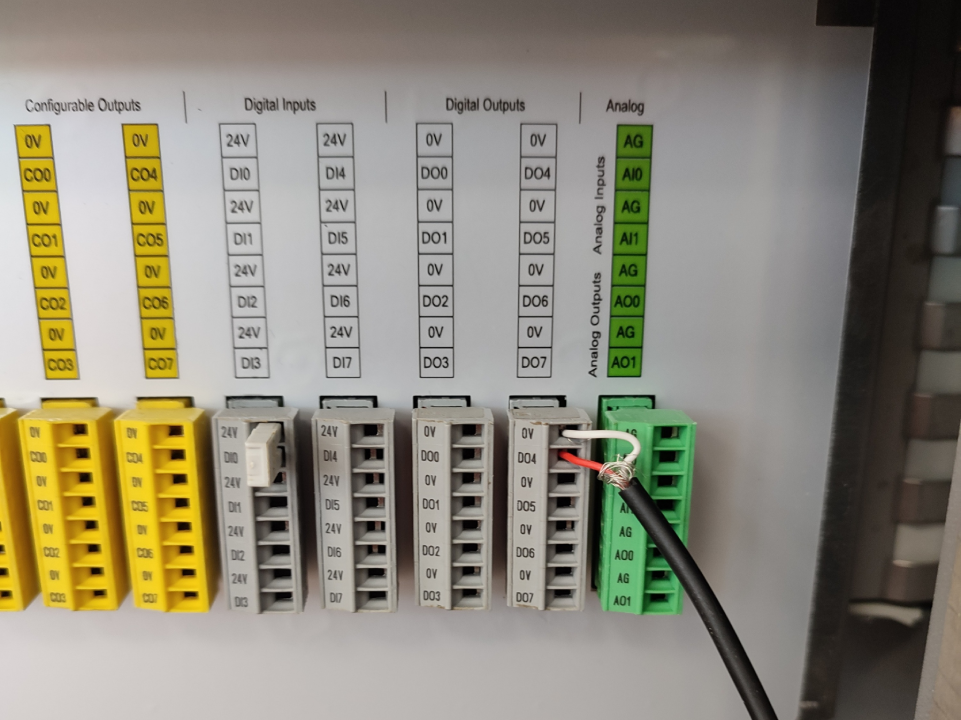
- Connect the non-pinned end to the desired Digital Output rack:
- Red wire to the DO slot.
- White wire to the corresponding 0 V slot.
Robot Connection
In cases where the application will be controlled directly by the robot (instead of through a PLC):
-
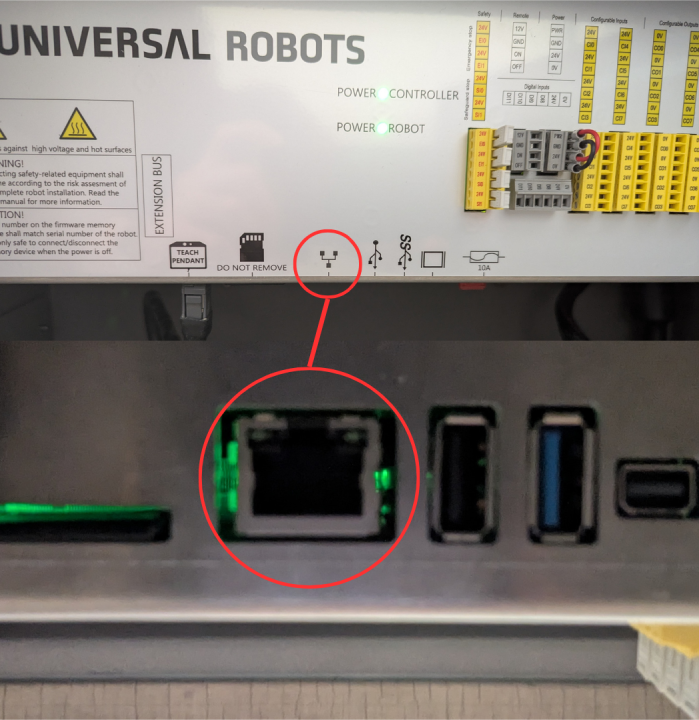
Connect the Ethernet cable to the corresponding port on the Pick[+] Server PC.
-
Connect the other end of the Ethernet cable to the robot controller.
-
In your UR Teach Pendant, go to Settings → System → Network and configure network connection as follows:
- IP: 200.200.2.2
- Network mask: 255.255.255.0
- Gateway: 200.200.2.1 (Pick[+] server listens to robot on this IP)
Check UR Configuration for more information about Robot Connection issues